In short: instead of emailing a description and a Google Maps screenshot, document a road-surface defect as a task on the map: pin it to the exact point (marker + chainage), attach a field photo (previewed in-app), set a status and an assignee, and keep the discussion and change history in one place. The repair crew lands exactly where it should — no more „somewhere on the A1 near the woods”.
The most common way to report road-surface damage looks like this: someone photographs a pothole, adds a Google Maps screenshot and a note like „right lane, past the exit”, and emails it around. The problem is that the repair crew can’t hit the exact spot — the screenshot has no coordinates, the photos scatter across inboxes, and nobody knows whether the report is already in progress or closed. This guide shows how to document a defect so that the photo, the exact location and the status all live in a single report.
This guide was written by the GeoMarkup team. It describes a real way of working with the product, using road inspections as the example. The screenshots are from the app; the data shown is sample data.
Why precise defect documentation matters
The cost of a vague report is concrete: the crew drives out and wastes time hunting for the fault, fixes the wrong stretch, or comes back for clarification. An email saying „past the woods” with a screenshot that has no coordinates leaves all the interpretation to the people in the field. A good report answers three questions at a glance: where exactly, what the photo shows, and what stage the case is at.
Step 1 — pin the defect to the exact point
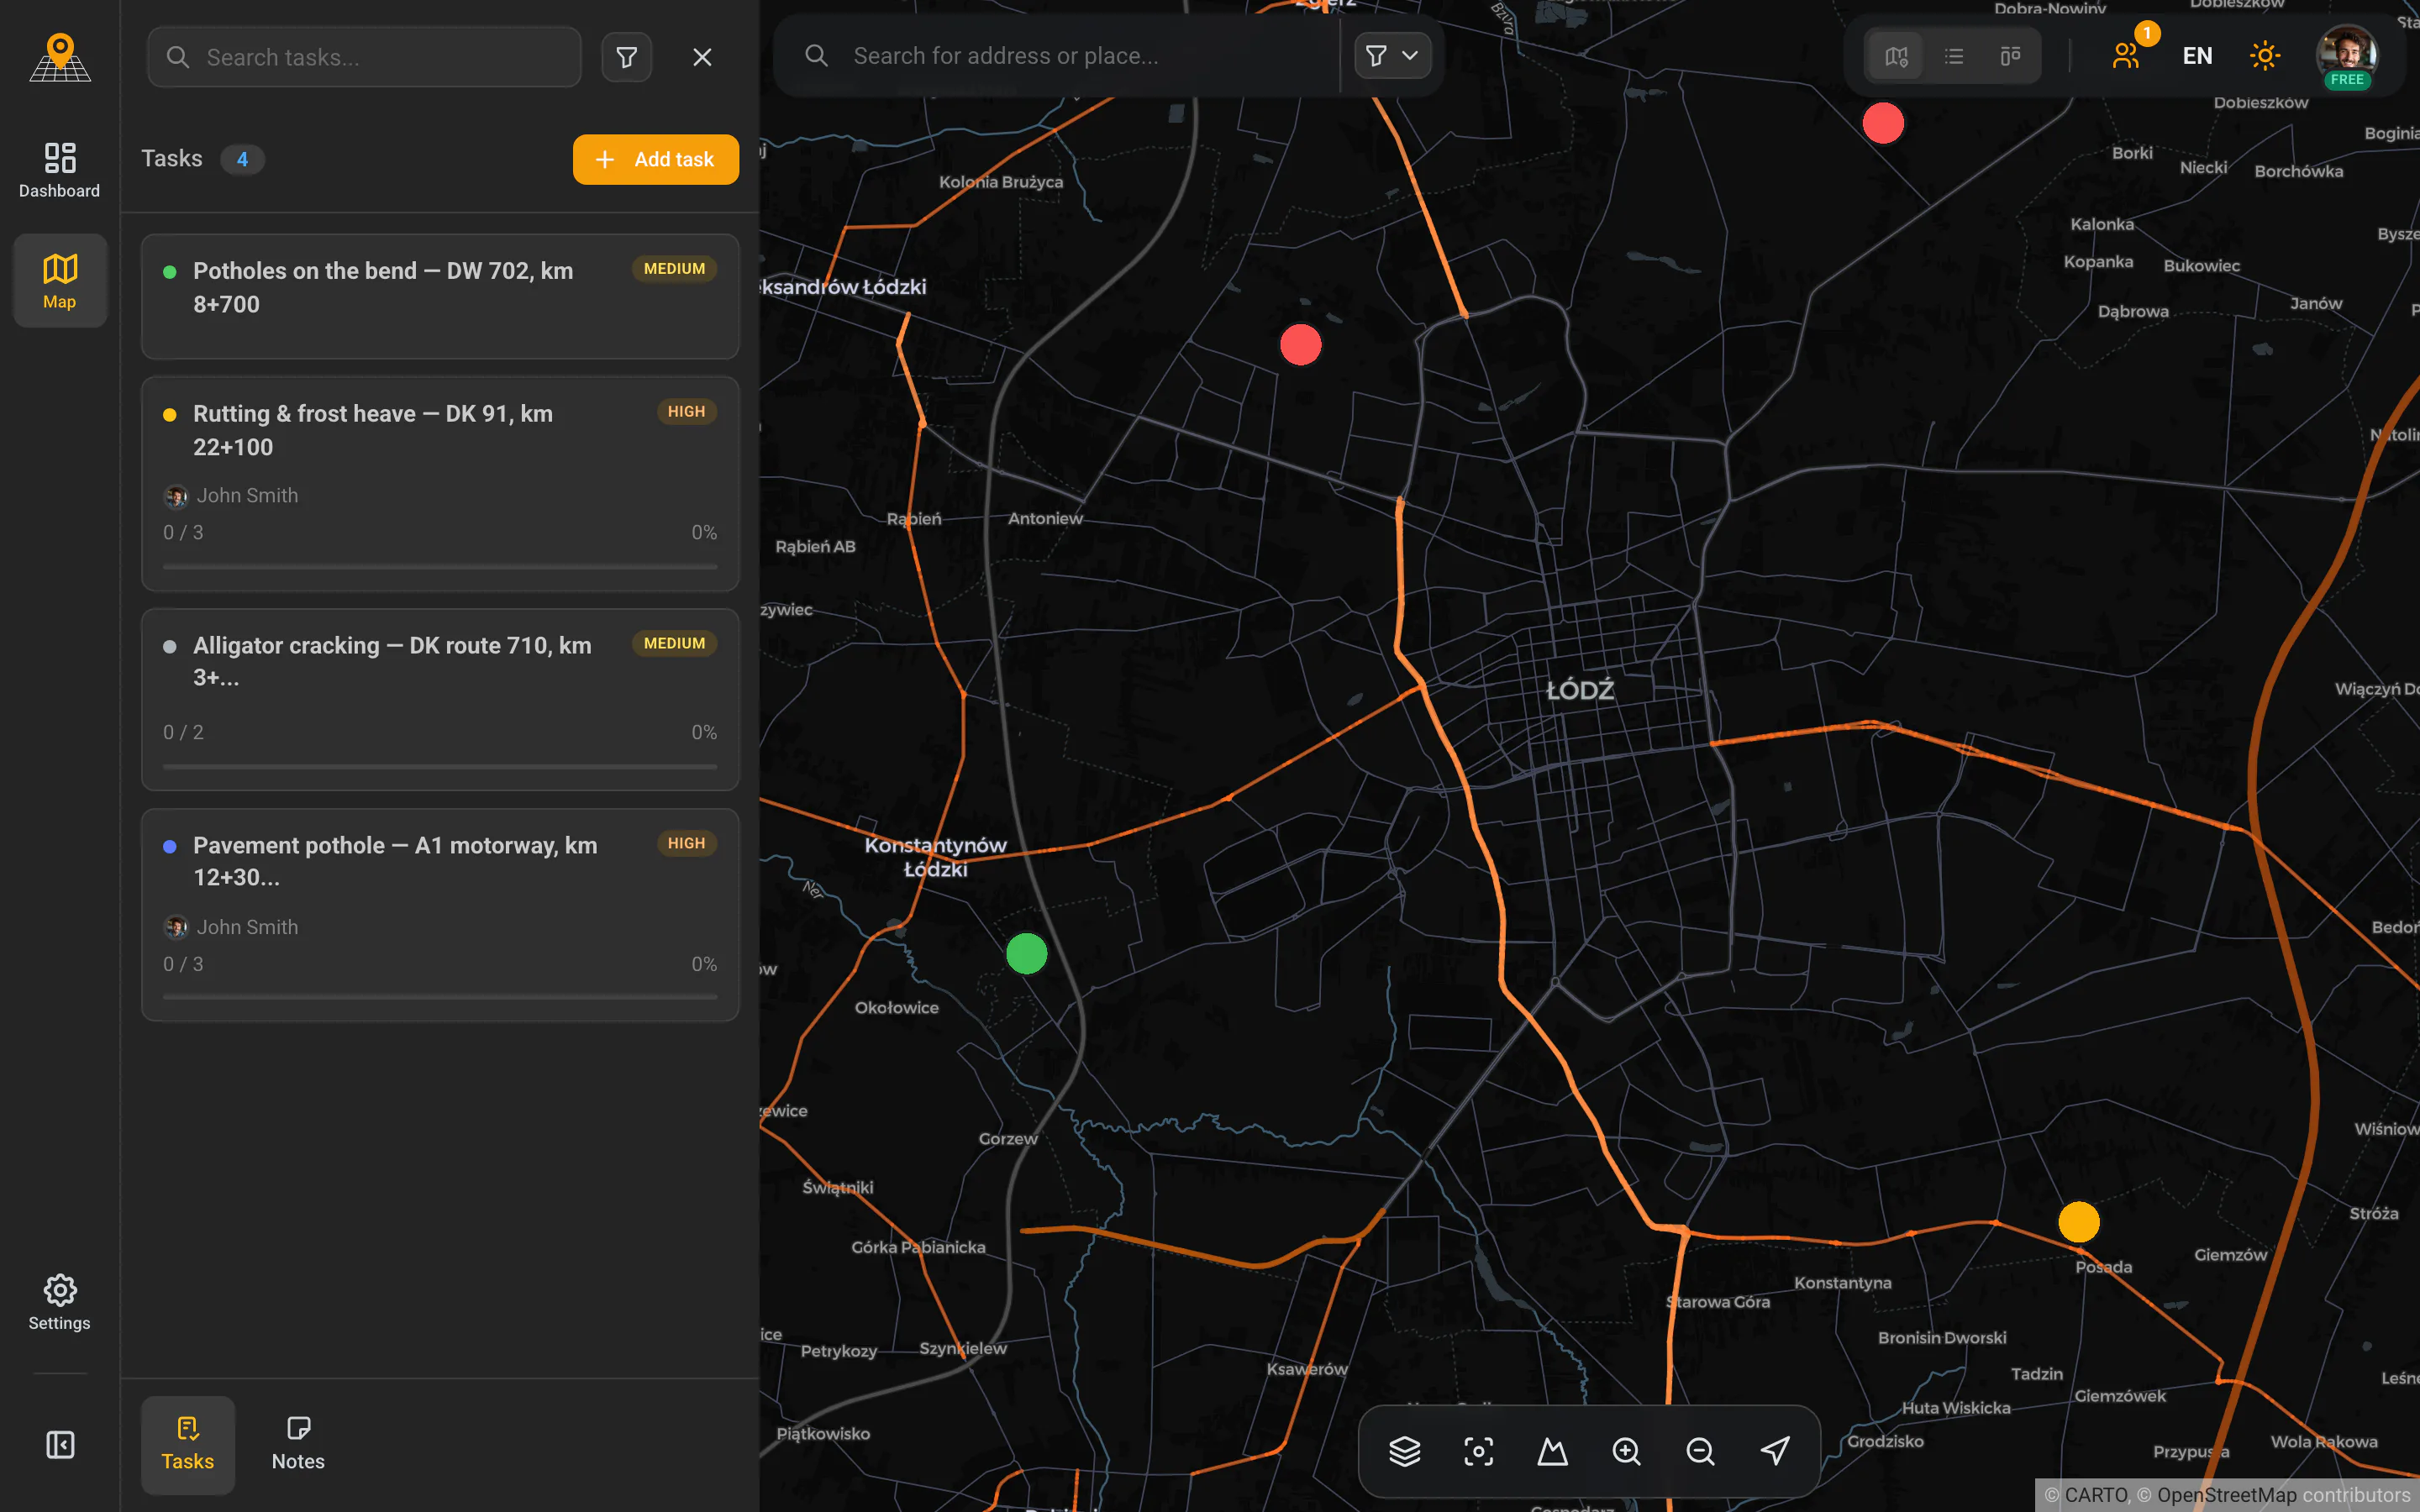
Instead of describing the spot in words, you click it on the map. A task on the map gets a marker at the exact point, and you fill in the location field with the road and chainage (e.g. „A1, km 12+300”). The report carries the coordinates, so anyone who opens it sees the same pin — the end of „somewhere on the A1 near the woods”.
Step 2 — attach field photos
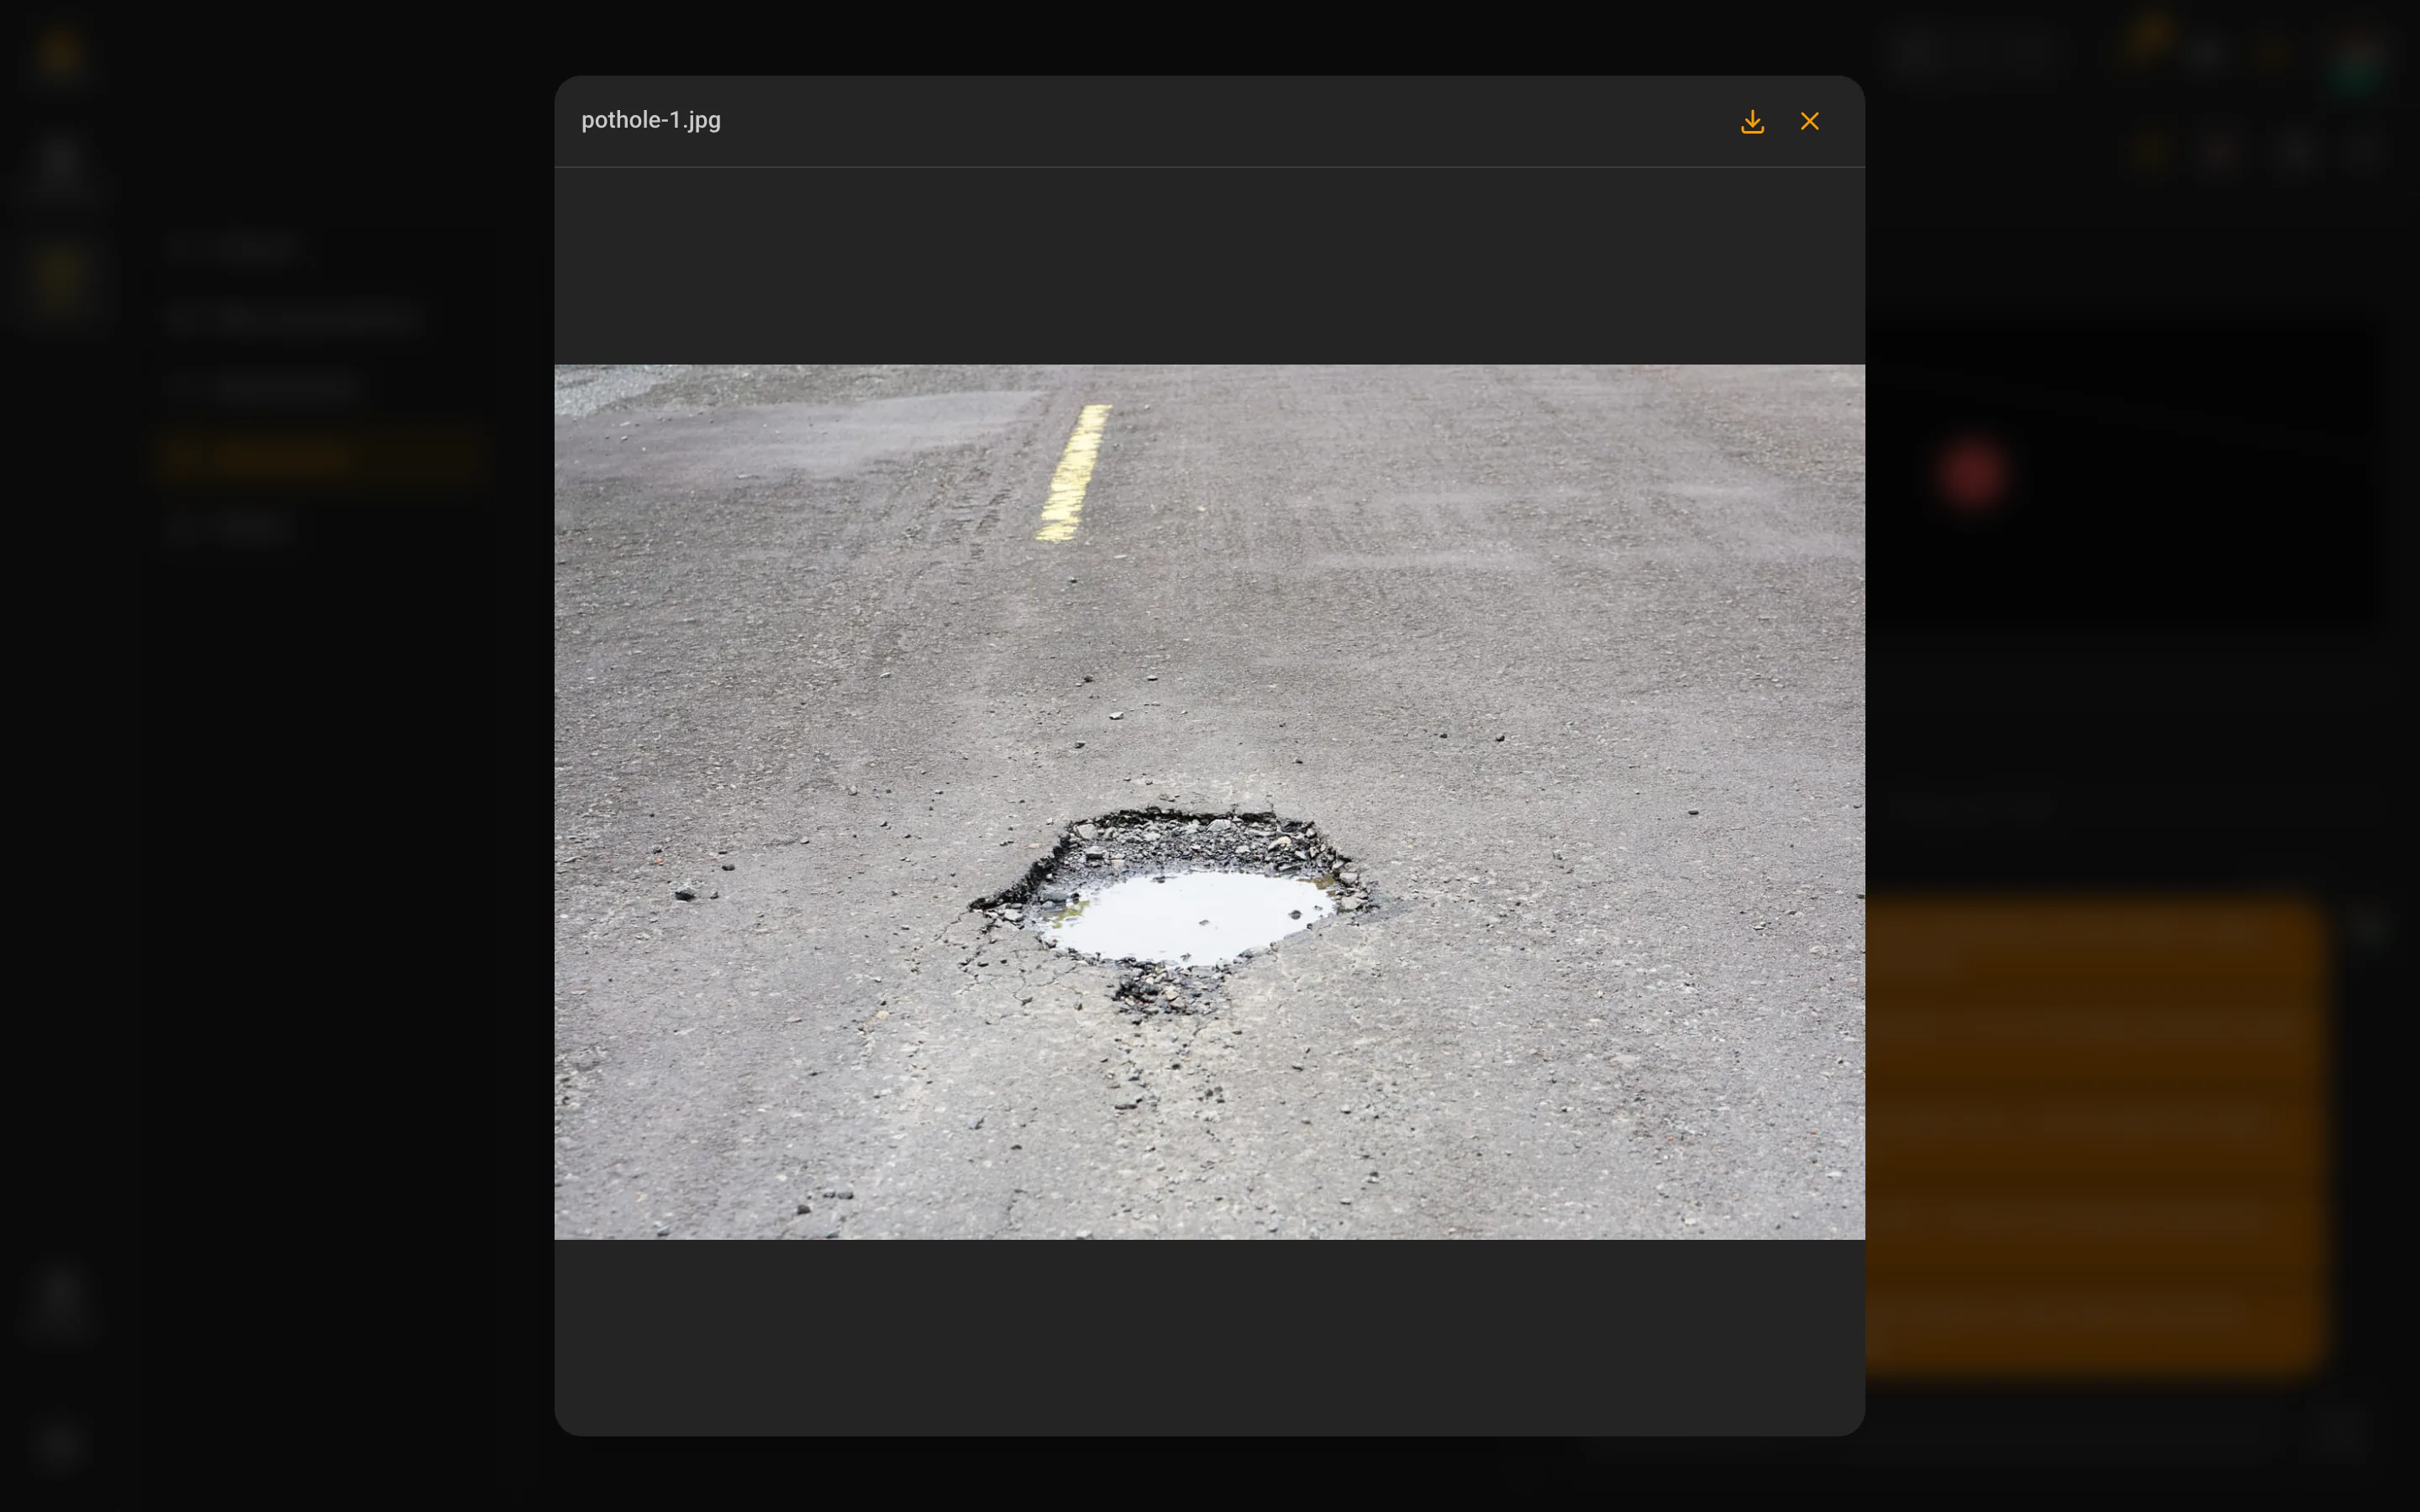
You attach photos of the damage to the report — as many as you need, each file up to 25 MB. Images open in an in-app preview, with no download step, so the office and the repair crew look at the very same field photo: the edges of the pothole, its depth, the surroundings. It’s the photo, not the description, that says whether a hot-mix patch or a temporary fix is needed.
Step 3 — add a description and a requirements checklist
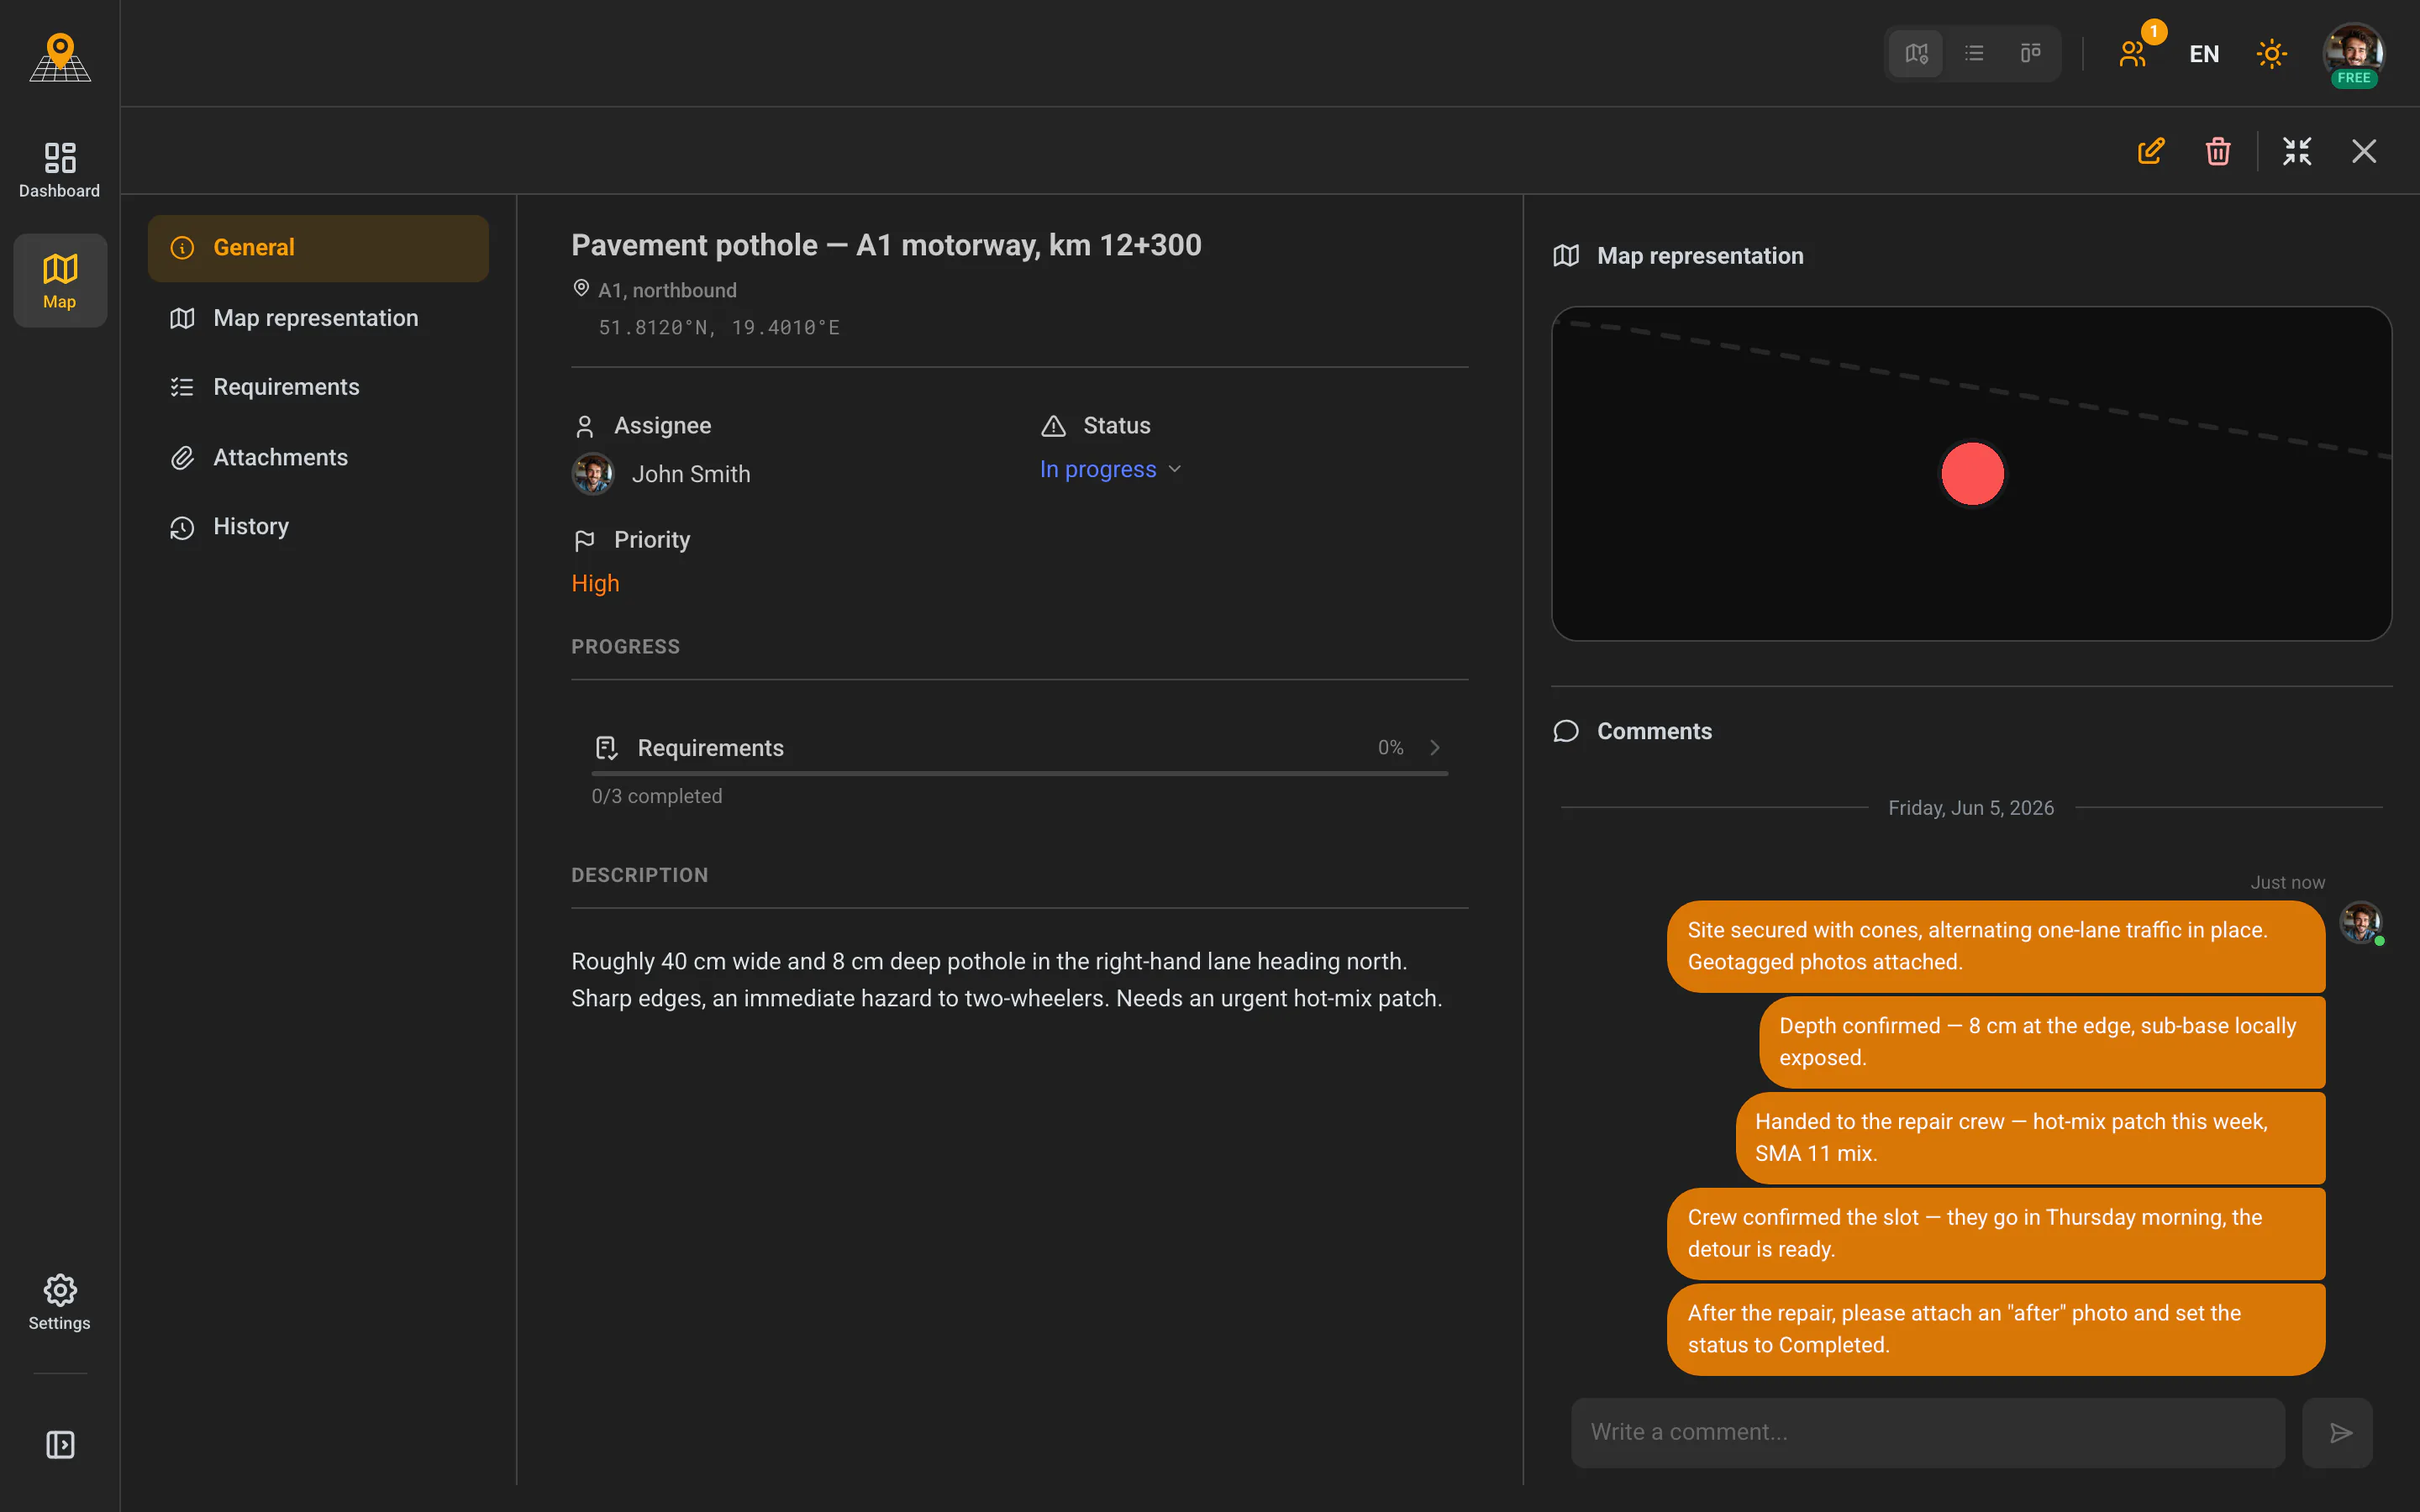
In the description you record the defect’s parameters — dimensions, depth, lane, hazard. On top of that you add a requirements checklist, the control points for this report — for example „Assess pavement condition”, „Photograph the damage” or „Mark and secure the site”. The list makes sure nothing is forgotten and shows progress — how many points are already ticked off.
Step 4 — set a status and an assignee
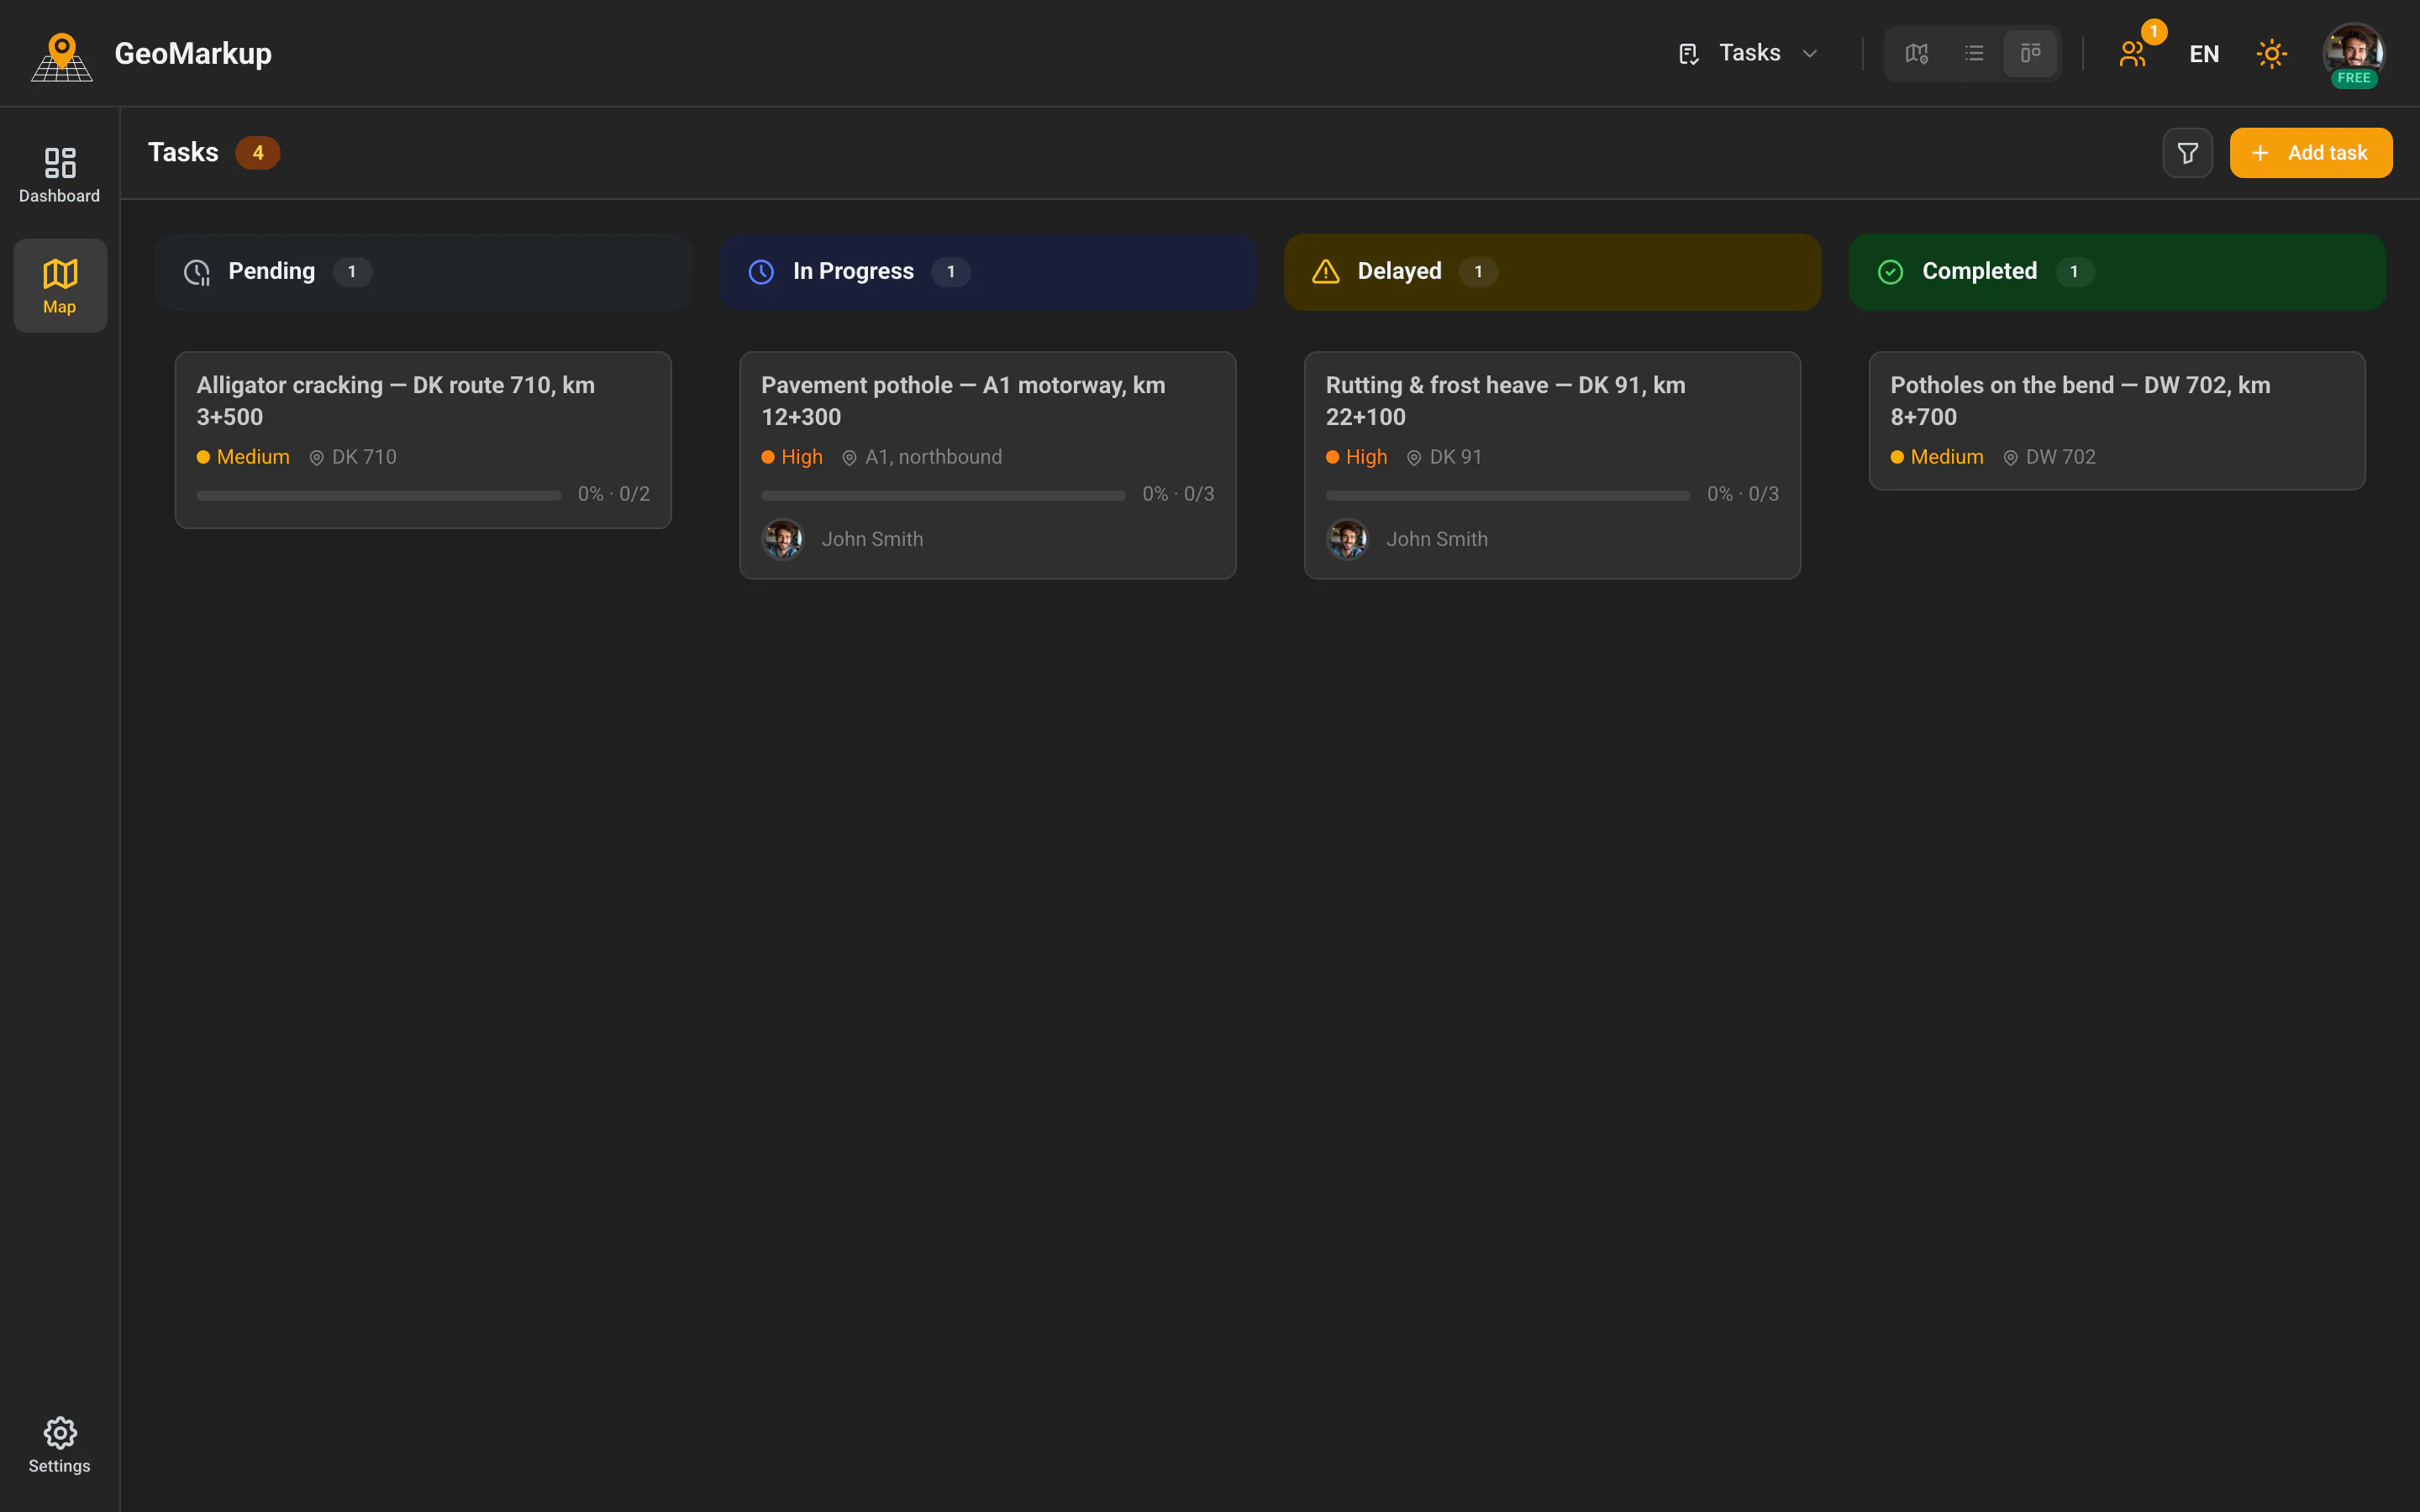
Every defect has a status (Pending, In Progress, Delayed, Completed) and an assignee. That makes it clear whether the case is waiting, under way or already closed — without chasing it by email. You see all reports at once in a list, a kanban board or on the map, grouped by status.
Step 5 — decisions in comments, an audit trail in history
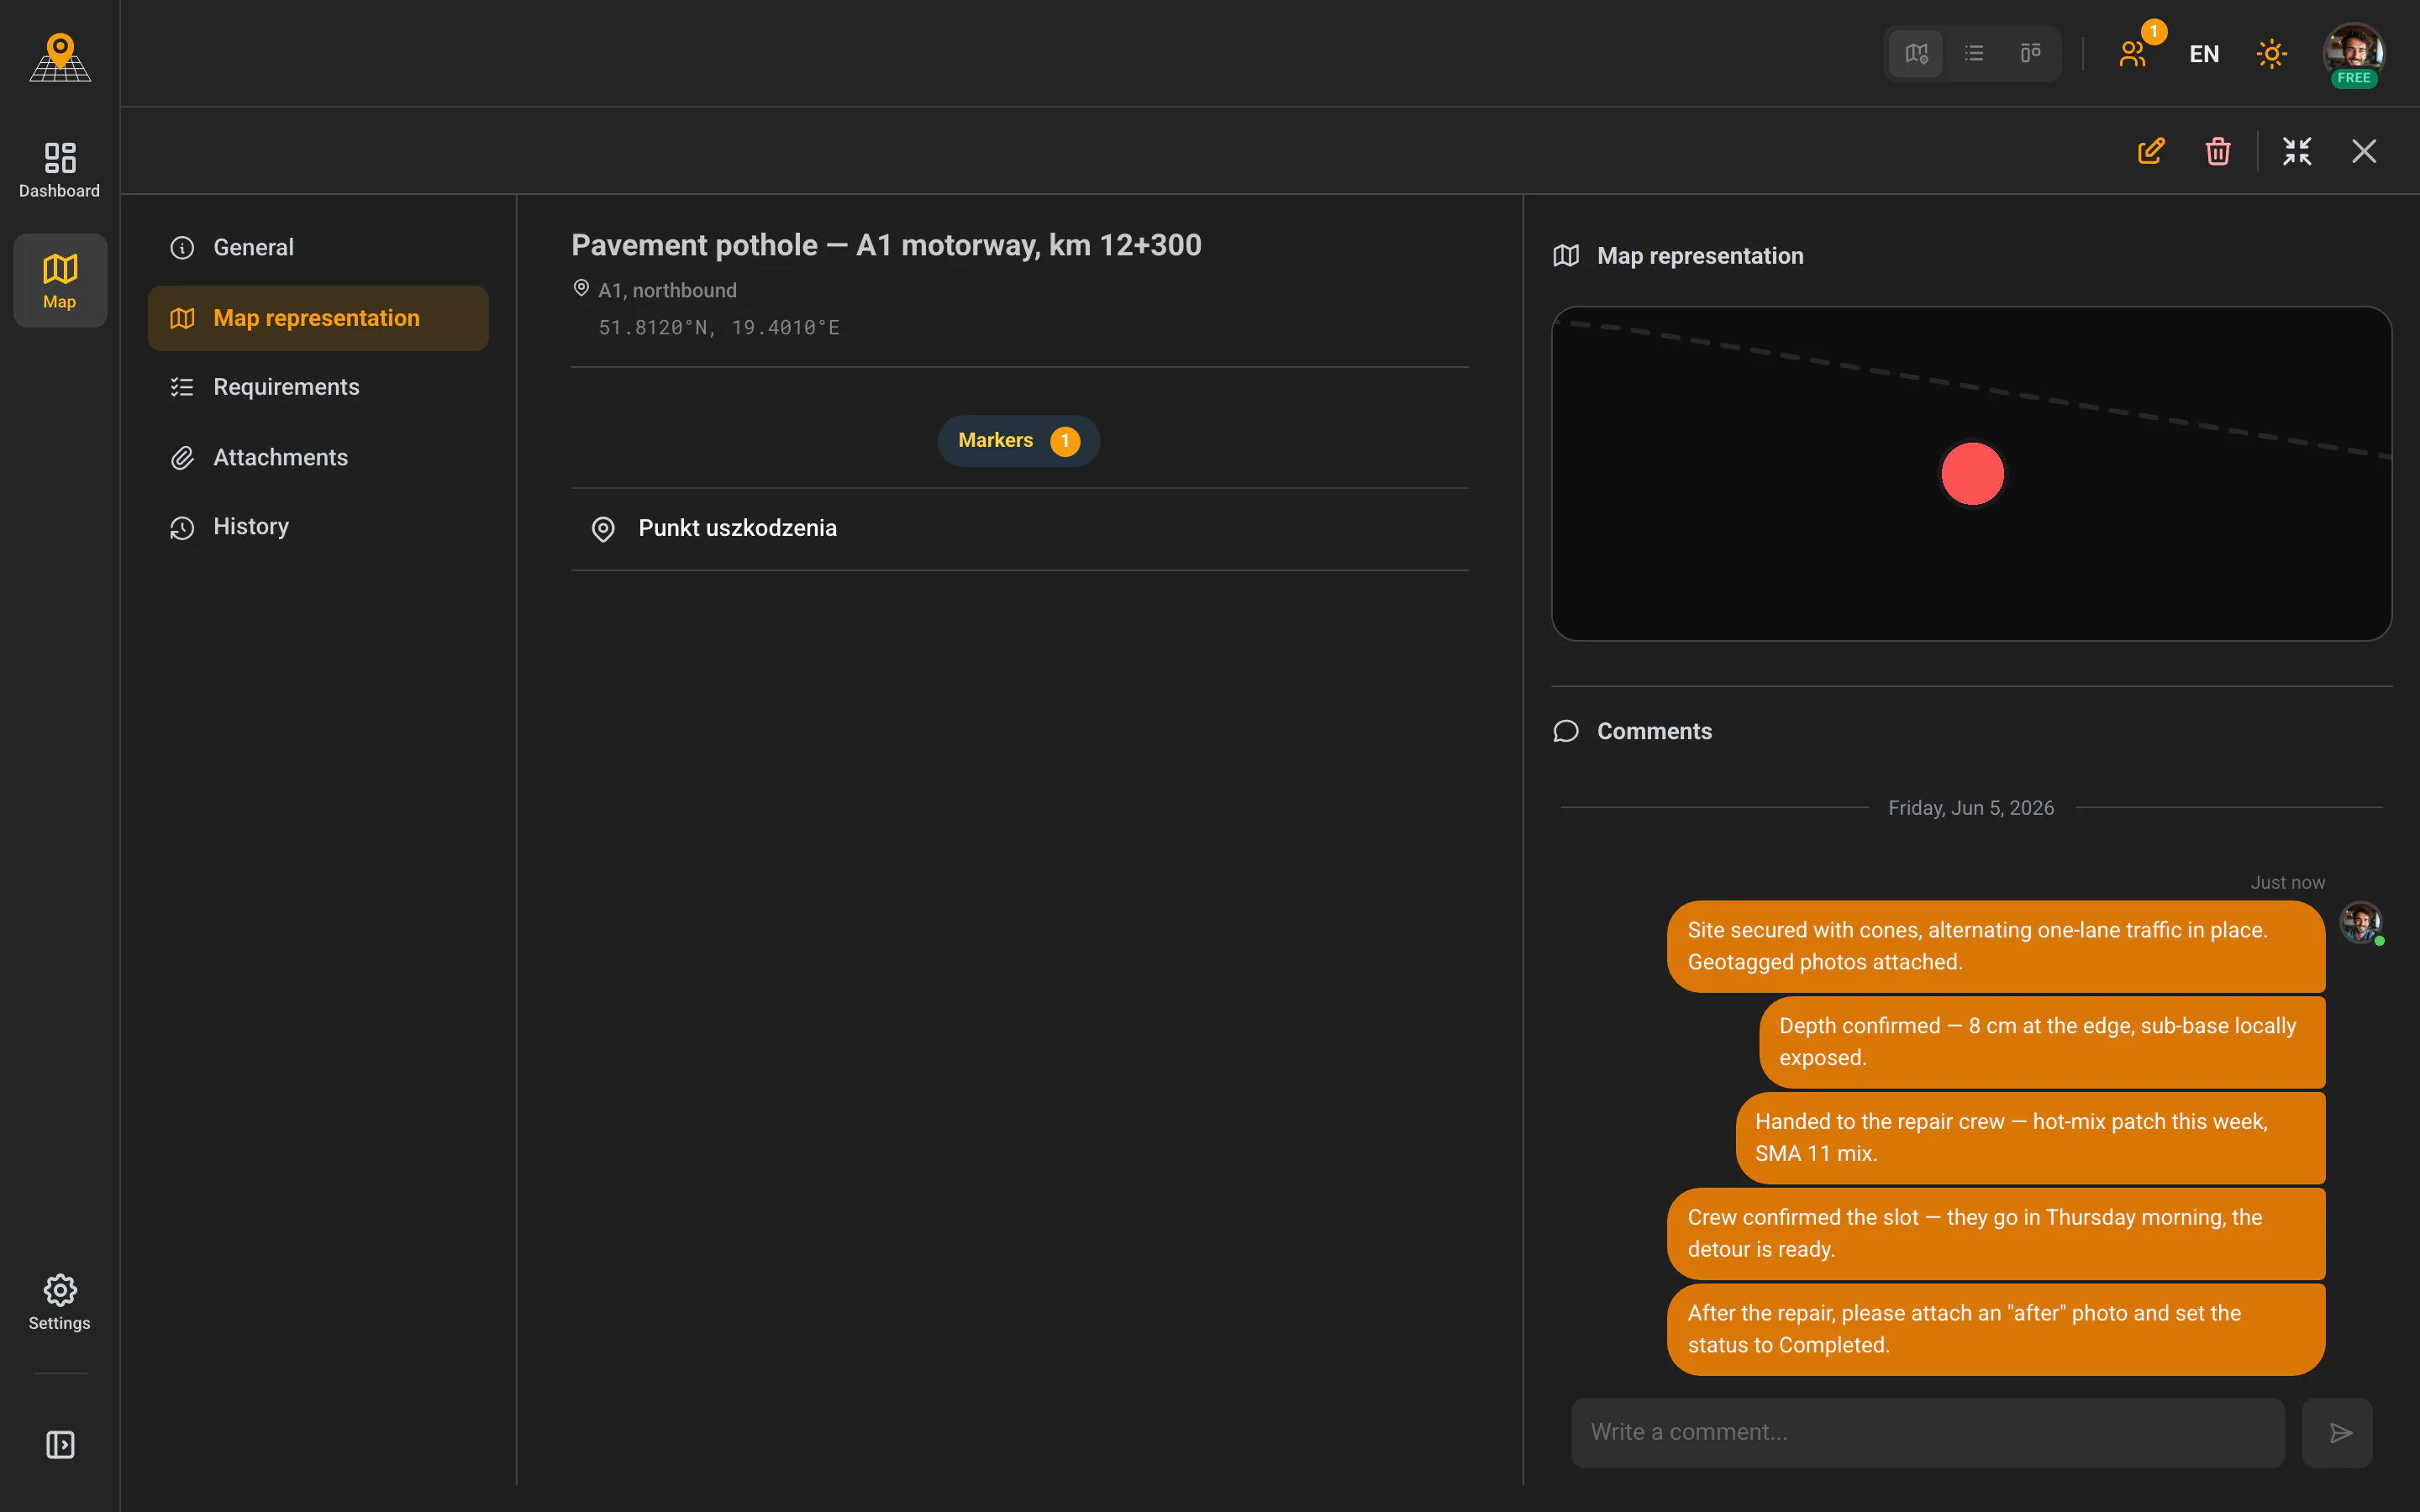
You keep every decision with the repair crew in comments right on the report — they appear live, with no refresh and no separate email thread. The context stays with the defect, not in someone’s inbox.
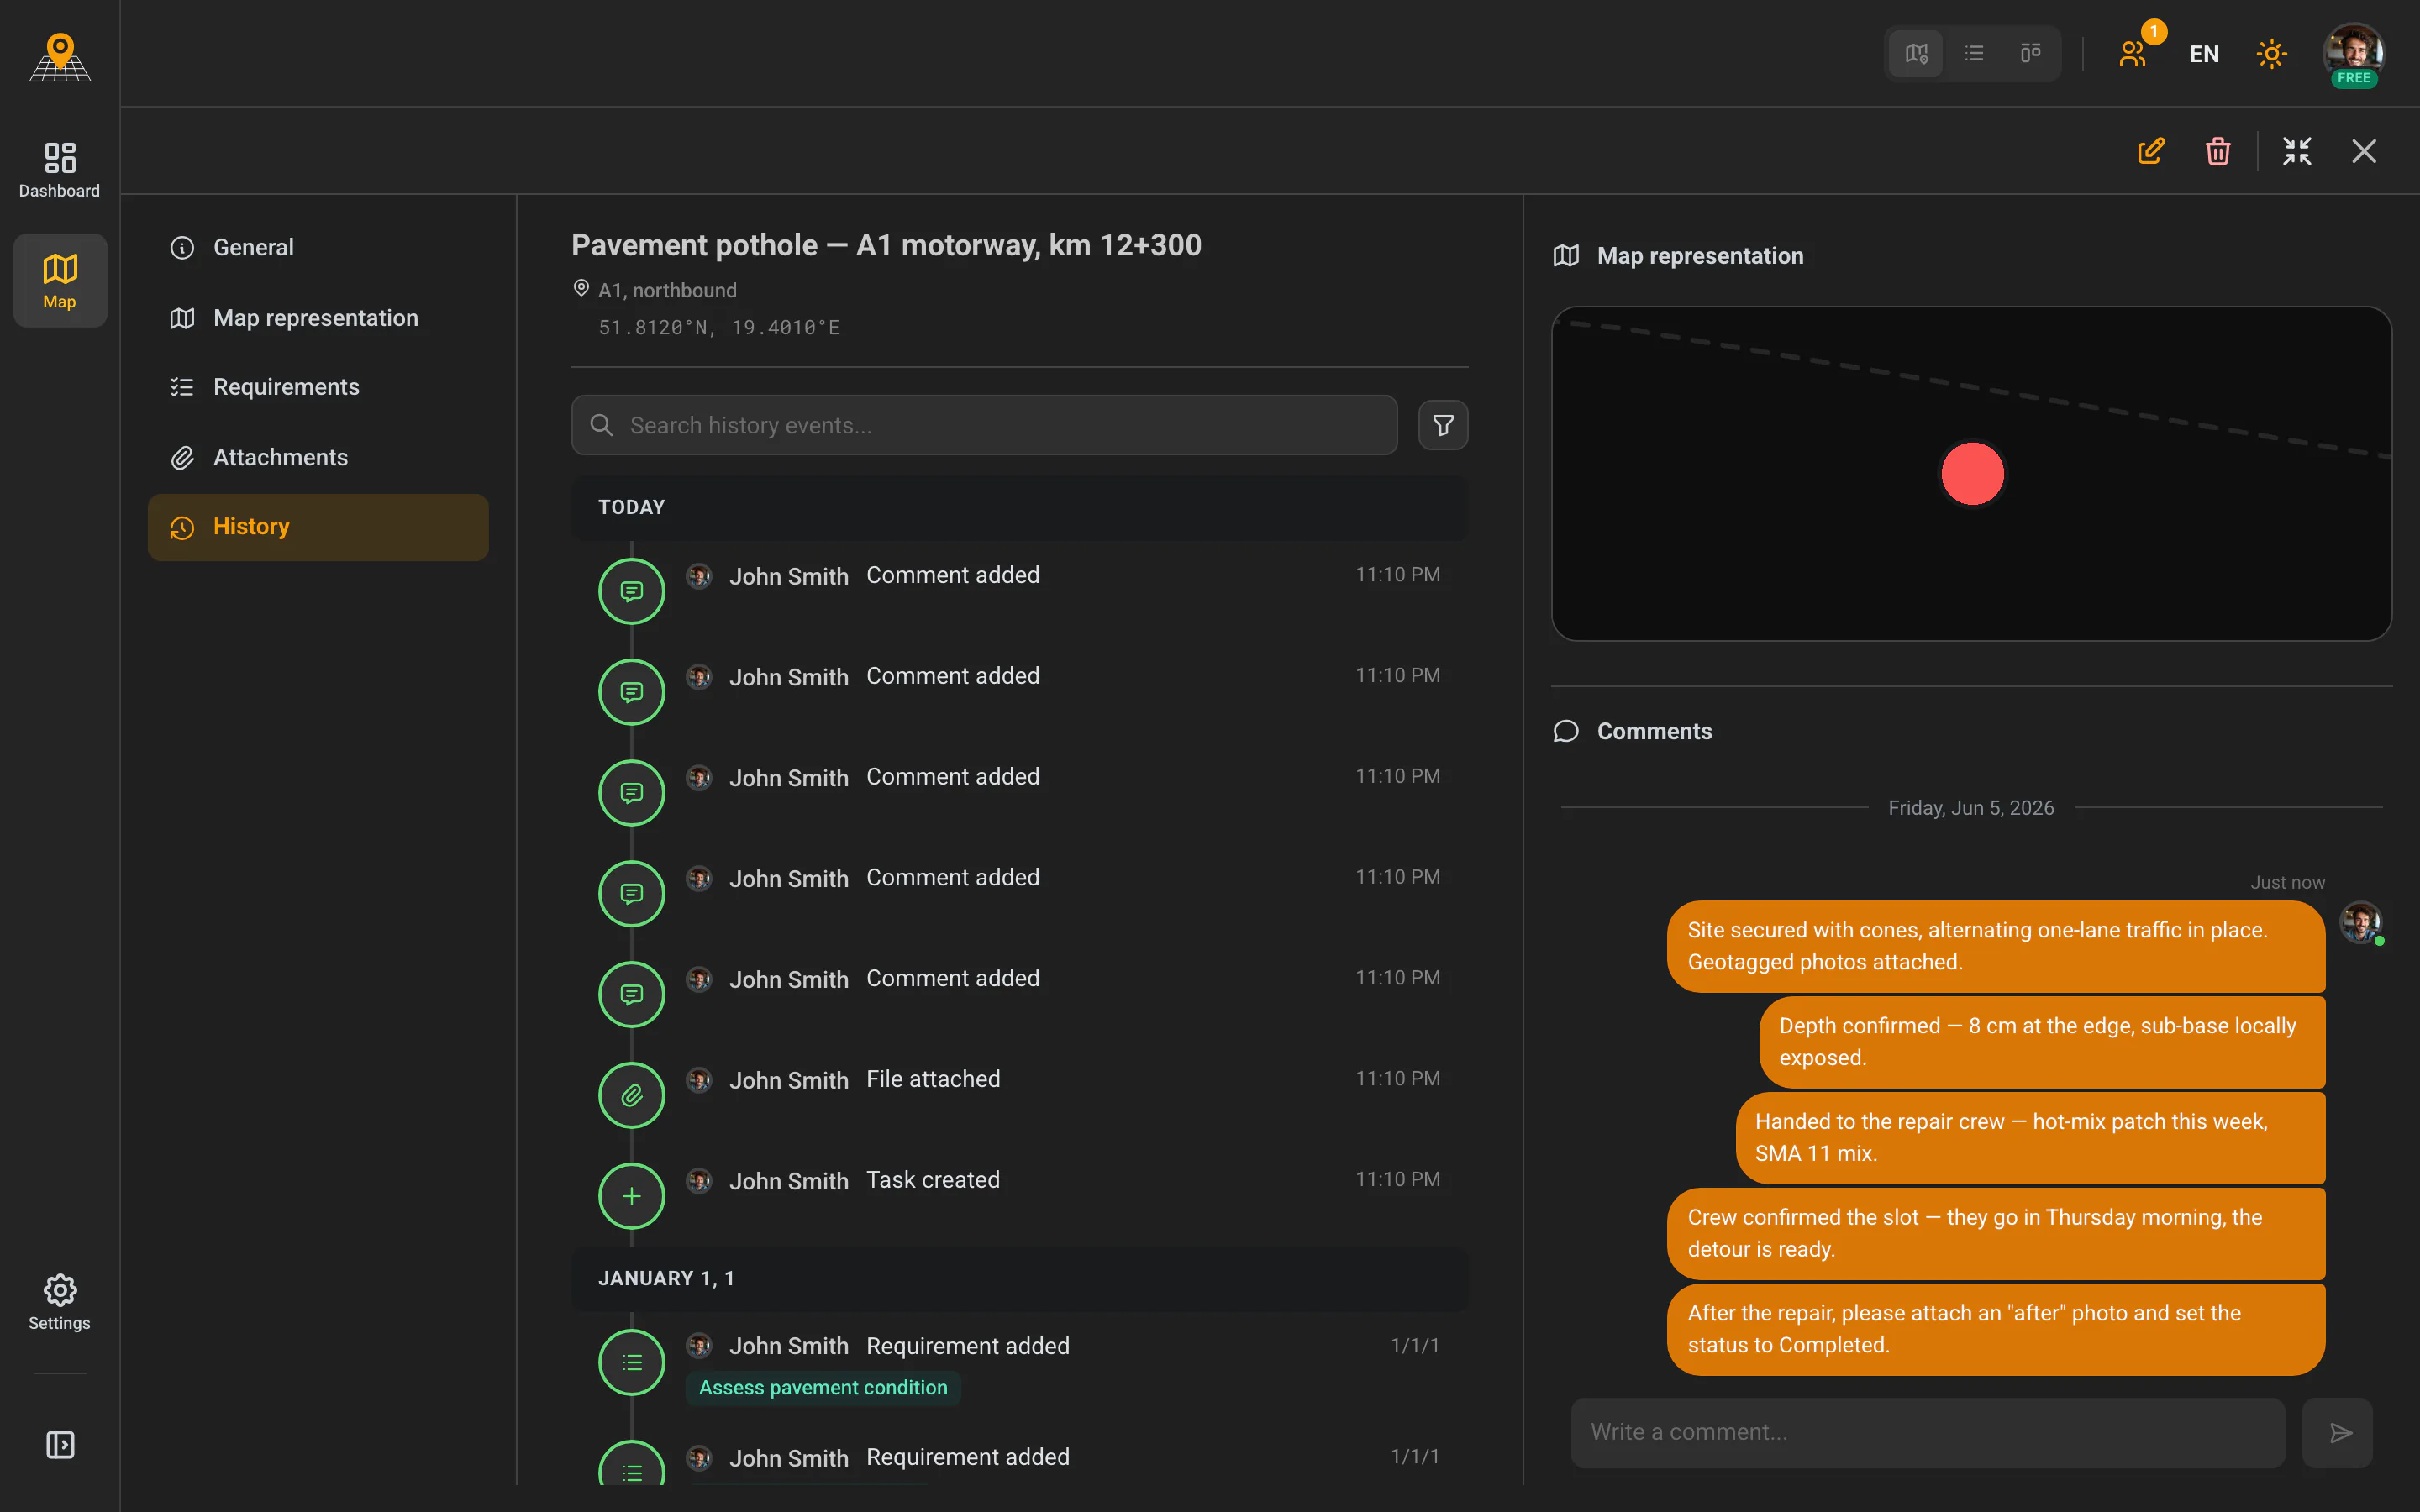
In parallel, every task keeps a change history: who created the report, who attached the photo, who commented and who changed the status — all stamped with a date and an author. It’s a ready-made audit trail, useful for signing off the work and for disputes over scope.
How this replaces „screenshot + email”
| Email with a Google Maps screenshot | A report in GeoMarkup | |
|---|---|---|
| Exact location | No — a word description, a screenshot without coordinates | Yes — a marker and chainage, an exact point |
| Photos in one place | scattered across inboxes | on the report, with an in-app preview |
| Status and accountability | in someone’s head or an email thread | a status + an assignee |
| History: who and when | No | Yes — a full audit trail |
| Access for the field crew | searching the inbox | a link, works in the browser |
| A view of all defects | No | a list, a kanban board or the map |
How to get started
- Create a free workspace and set the map to your area.
- Report the first defect — click the point on the map and describe the damage.
- Attach a field photo and type the road and chainage.
- Set a status and an assignee, and keep the discussion in comments.
The result: instead of an email the crew has to decode, you get a structured report with the location, a photo and a status — opened from a link, in the browser, on a phone in the field and on a desktop in the office.
Related guides
- Tasks — how tasks on the map work, from report to close-out.
- Map and tools — markers, layers, basemaps and place search.
- All guides — more guides and comparisons.
Frequently asked questions
How do I document a pothole so the crew finds the exact spot?
Pin the task with a marker to the exact point on the map and fill in the location field (e.g. A1, km 12+300). The repair crew opens the report from a link and sees the coordinates and the pin instead of a description like „somewhere near the woods”.
How many photos can I attach to one report?
As many as the case needs — there is no fixed limit on the number of files. Each file can be up to 25 MB — photos, PDFs and documents. Images open in an in-app preview, with no need to download them first.
Does GeoMarkup record who changed the status and when?
Yes. Every task keeps a full change history — creation, file attachment, comments and status changes, each stamped with a date and an author. It is a ready-made audit trail for the report.
Can I work without installing an app on the phone?
Yes. GeoMarkup runs in the browser on a phone, tablet and desktop — all you need is a link. There is nothing to install or update on the field crew’s devices.
How do I mark the exact location of the damage?
You click the point on the map (a marker) and also type the road and chainage in the location field. The task carries the coordinates, so the repair lands exactly where it should.
Is GeoMarkup free?
Yes, it is completely free right now, with no card and no limits. It is a fast way to replace „screenshot + email” with a structured report that carries the location, a photo and a status.