9. Tasks
A task is the basic unit of work in GeoMarkup — a piece of work to be done, pinned to a place on the map. This chapter explains what a task is made of, and how to add, edit and delete tasks.
Ways of browsing tasks (list, Kanban board, map) are covered in a separate chapter, Task views.
What a task is made of
Every task can contain:
| Element | Description |
|---|---|
| Title | A short task name (required, 3–100 characters). |
| Description | Detailed information, context, instructions (up to 1000 characters). |
| Status | The stage the task is at — see Statuses. |
| Priority | How urgent the task is — see Priorities. |
| Assignee | The person responsible for the task (a team member). |
| Location | The name of a place/road, e.g. “A1”, “DK1”, “Warsaw”. |
| Planned start | The date from which the task should be carried out (optional). |
| Planned end (due date) | The date by which the task should be done (optional). |
| Geometries | Drawings on the map: markers, lines, shapes — see below. |
| Requirements | A checklist of sub-tasks to tick off. |
| Attachments | Files attached to the task. |
| Comments | Discussion between team members. |
| Related tasks | Links to other tasks. |
| History | An automatic log of all changes. |
| Notes | Notes linked to this task. |
Geometries — a task’s drawings on the map
A task has a red pin (anchor) on the map — its main reference point. In addition you can draw any number of geometries of three types:
- Marker — a single point; you can choose the shape (circle/square/triangle), colour and icon,
- Line — a polyline of several points; you can set the style (solid/dashed/dotted), width and colour,
- Shape — a figure (rectangle/circle/triangle); you can set the fill and border.
How to draw and style geometries is described in the Map & tools chapter.
Task statuses
The status tells you what stage a task is at:
| Status | Meaning |
|---|---|
| Pending | Task created, not started yet. |
| In Progress | The task is under way. |
| Delayed | The task has missed its due date and needs attention. |
| Completed | The task is done. (In Kanban view the column is called “Completed”.) |
A task past its due date that is not completed may also be marked with an “Overdue” label.
When can’t a task be completed? You can’t mark a task Completed if not all its requirements are ticked off, or not all related tasks are completed (when the option to require them is enabled).
Priorities
The priority tells you how urgent a task is:
| Priority | Colour |
|---|---|
| Urgent | red |
| High | orange |
| Medium | yellow |
| Low | grey |
Adding a new task
A task is always tied to a place on the map, so creating one starts with picking a location.
How to start:
- Click “Add task” (in list or Kanban view) — the app prompts: “Click on the map to choose the task location”. Click the spot you want. or
- On the map, right-click (on a phone: long press) and choose “Add task”.
The new-task wizard opens — a form split into steps. While filling it in, you see the red pin (anchor) on the map, which you can drag, and the toolbox for drawing geometries.
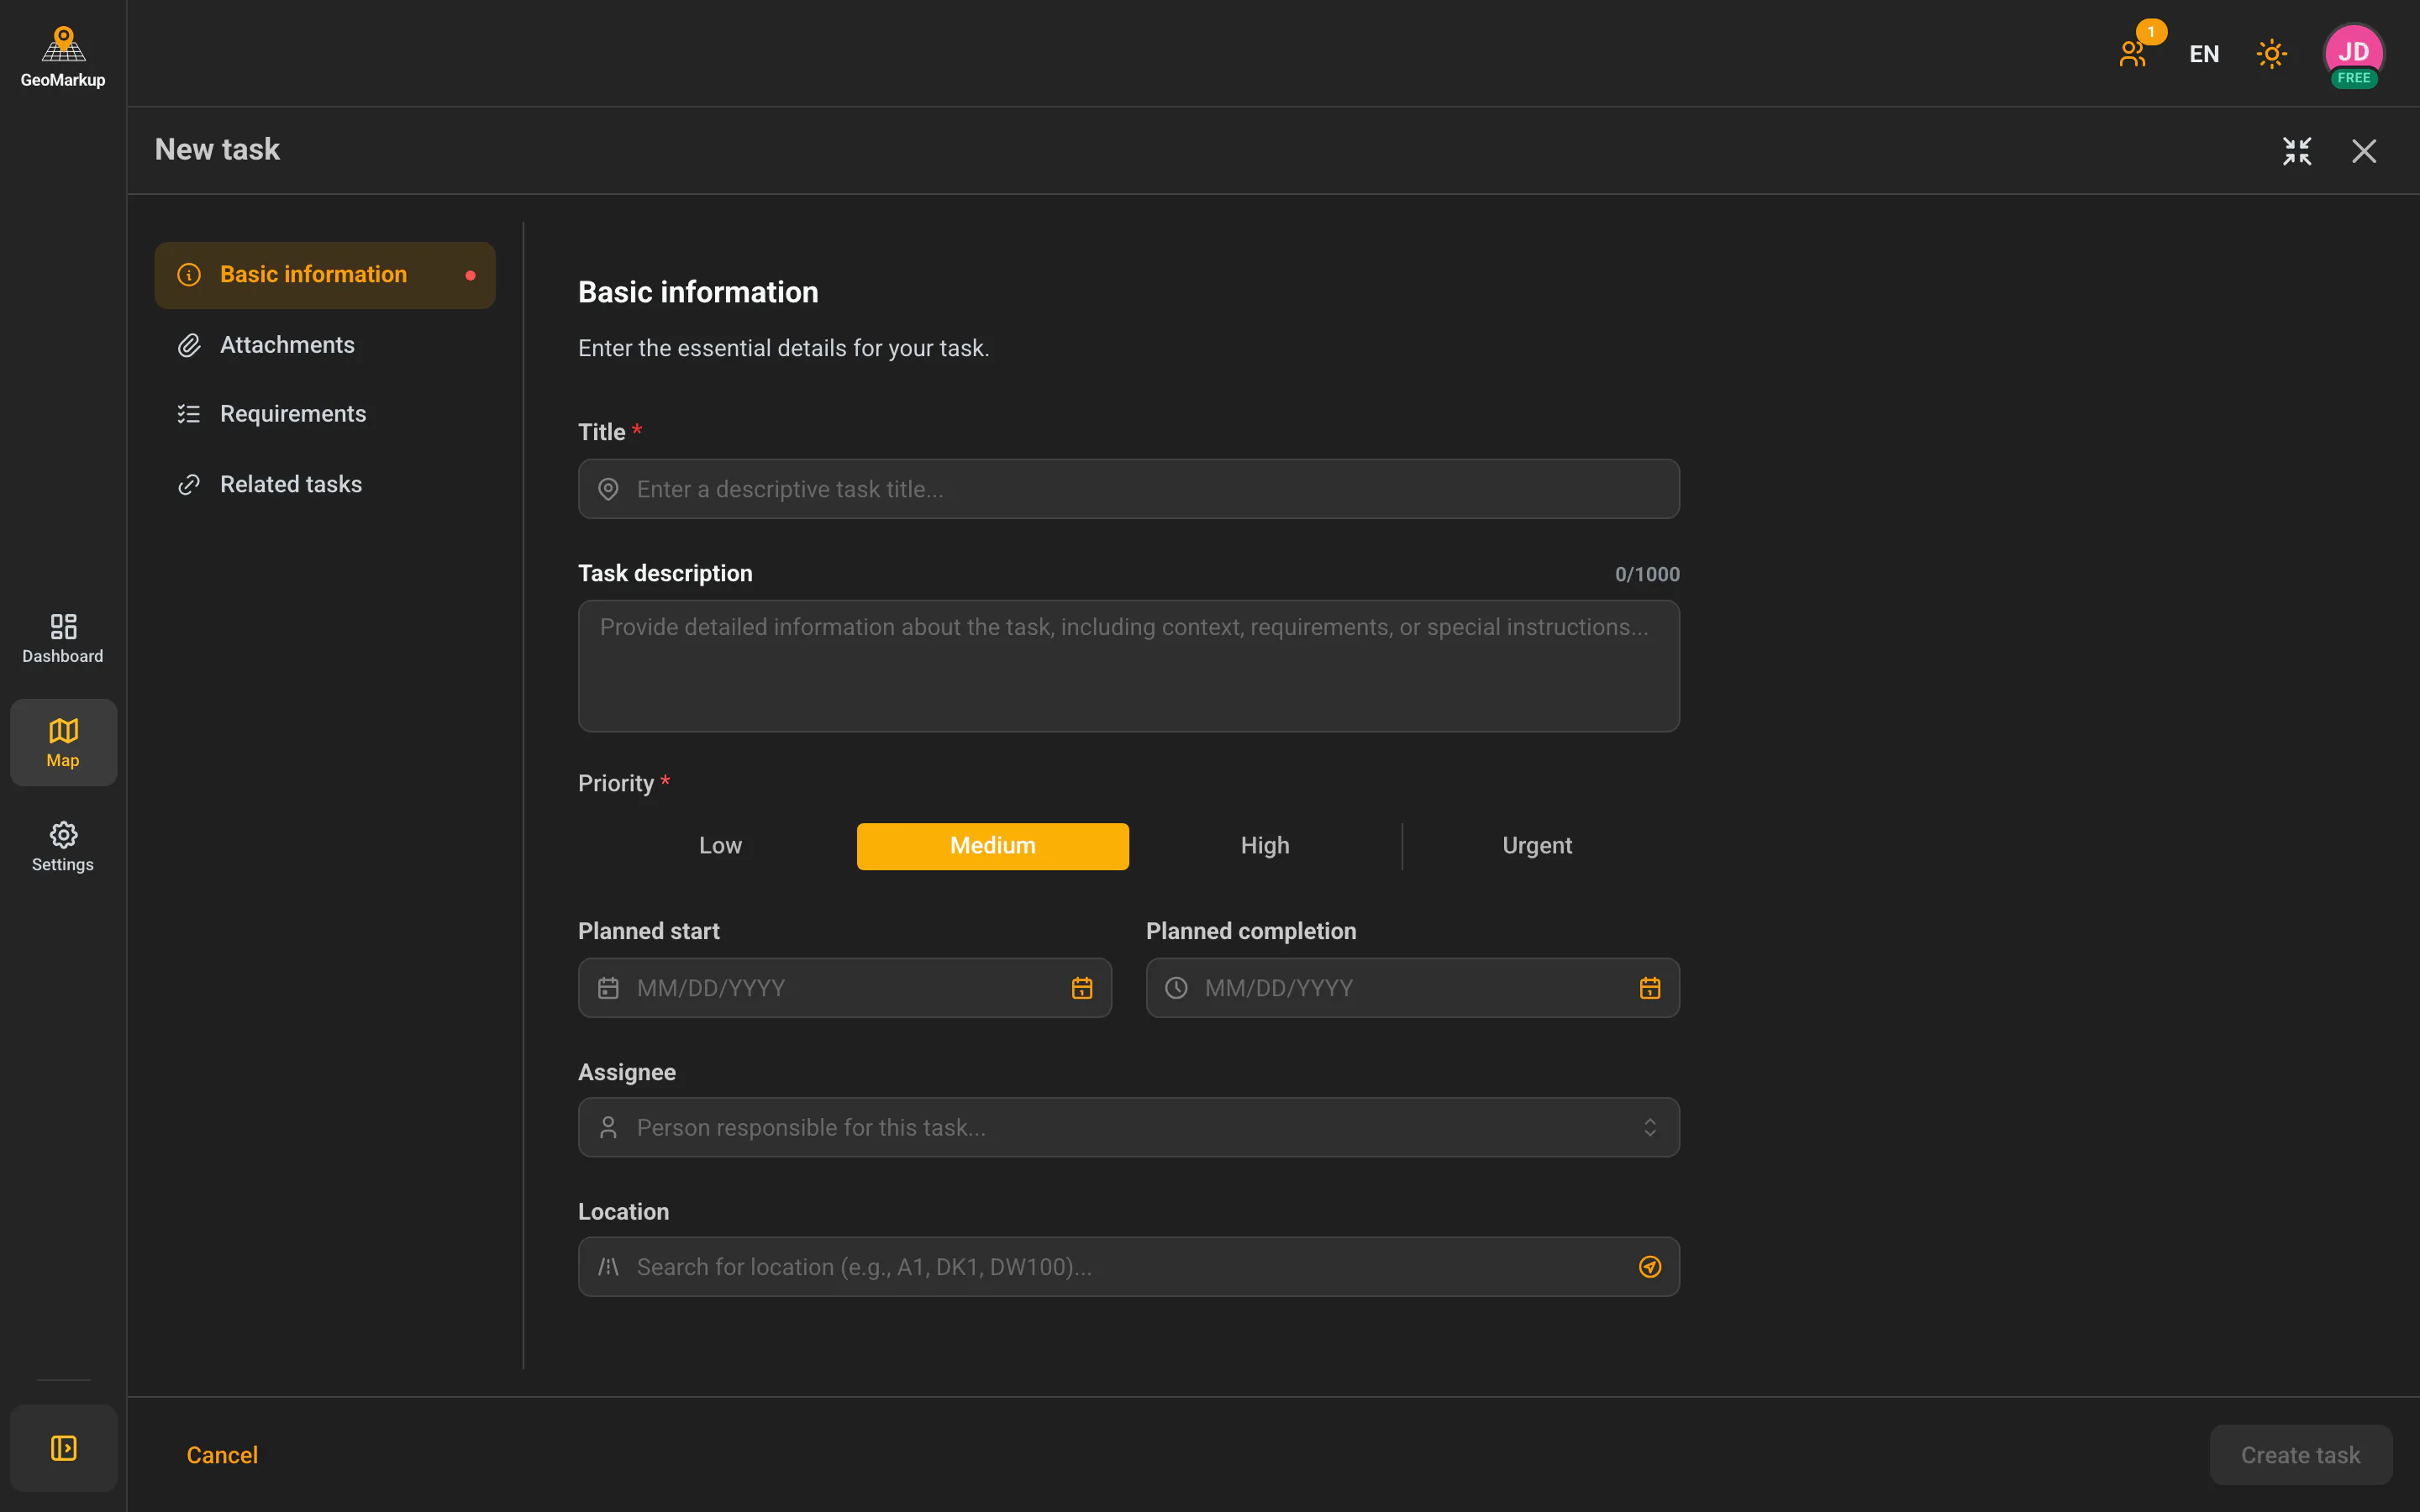
Step 1 — Basic information
| Field | Description |
|---|---|
| Title (required) | A descriptive task title. |
| Priority (required) | Choose one of four: Low / Medium / High / Urgent. |
| Planned start | Start date (optional). |
| Planned end | Due date (optional). |
| Assignee | Choose a person from the team. |
| Location | Type or search for a road/address (e.g. “A1”, “DK1”). You can also use the “Use GPS” button. |
Here too you can draw the task’s geometries with the toolbox on the map (if you don’t add any, you’ll see the hint “No geometries yet”).
Step 2 — Detailed information
- Task description — details, context, instructions (a counter shows how many of the 1000 characters you’ve used),
- Attachments — drag files in or click to select them. Supported formats: JPG, PNG, GIF, PDF, TXT, DOC, DOCX, XLS, XLSX. Limit: 5 MB per file, up to 10 files.
Step 3 — Task requirements
Here you build a checklist — the steps that must be done for the task to count as finished.
- Type the requirement text and click “Add requirement” (or press Enter).
- Repeat for further items.
- You can reorder (drag), edit and delete items.
The app suggests ready-made example requirements (e.g. “Assess road surface condition”, “Photographic documentation of damage”).
Step 4 — Related tasks (if other tasks exist)
You can link this task to others:
- Click “Click to add related tasks”.
- Choose tasks from the list (you can search and filter them).
- Optionally tick “Require all related tasks to be completed” — then you won’t be able to close this task until the related ones are completed.
Saving the task
- Use the “Back” / “Next” buttons to move between steps.
- On the last step, click “Create task”.
- After saving you’ll see “Task created successfully”.
If you try to close the wizard with unsaved changes, the app asks whether you really want to close and lose your changes.
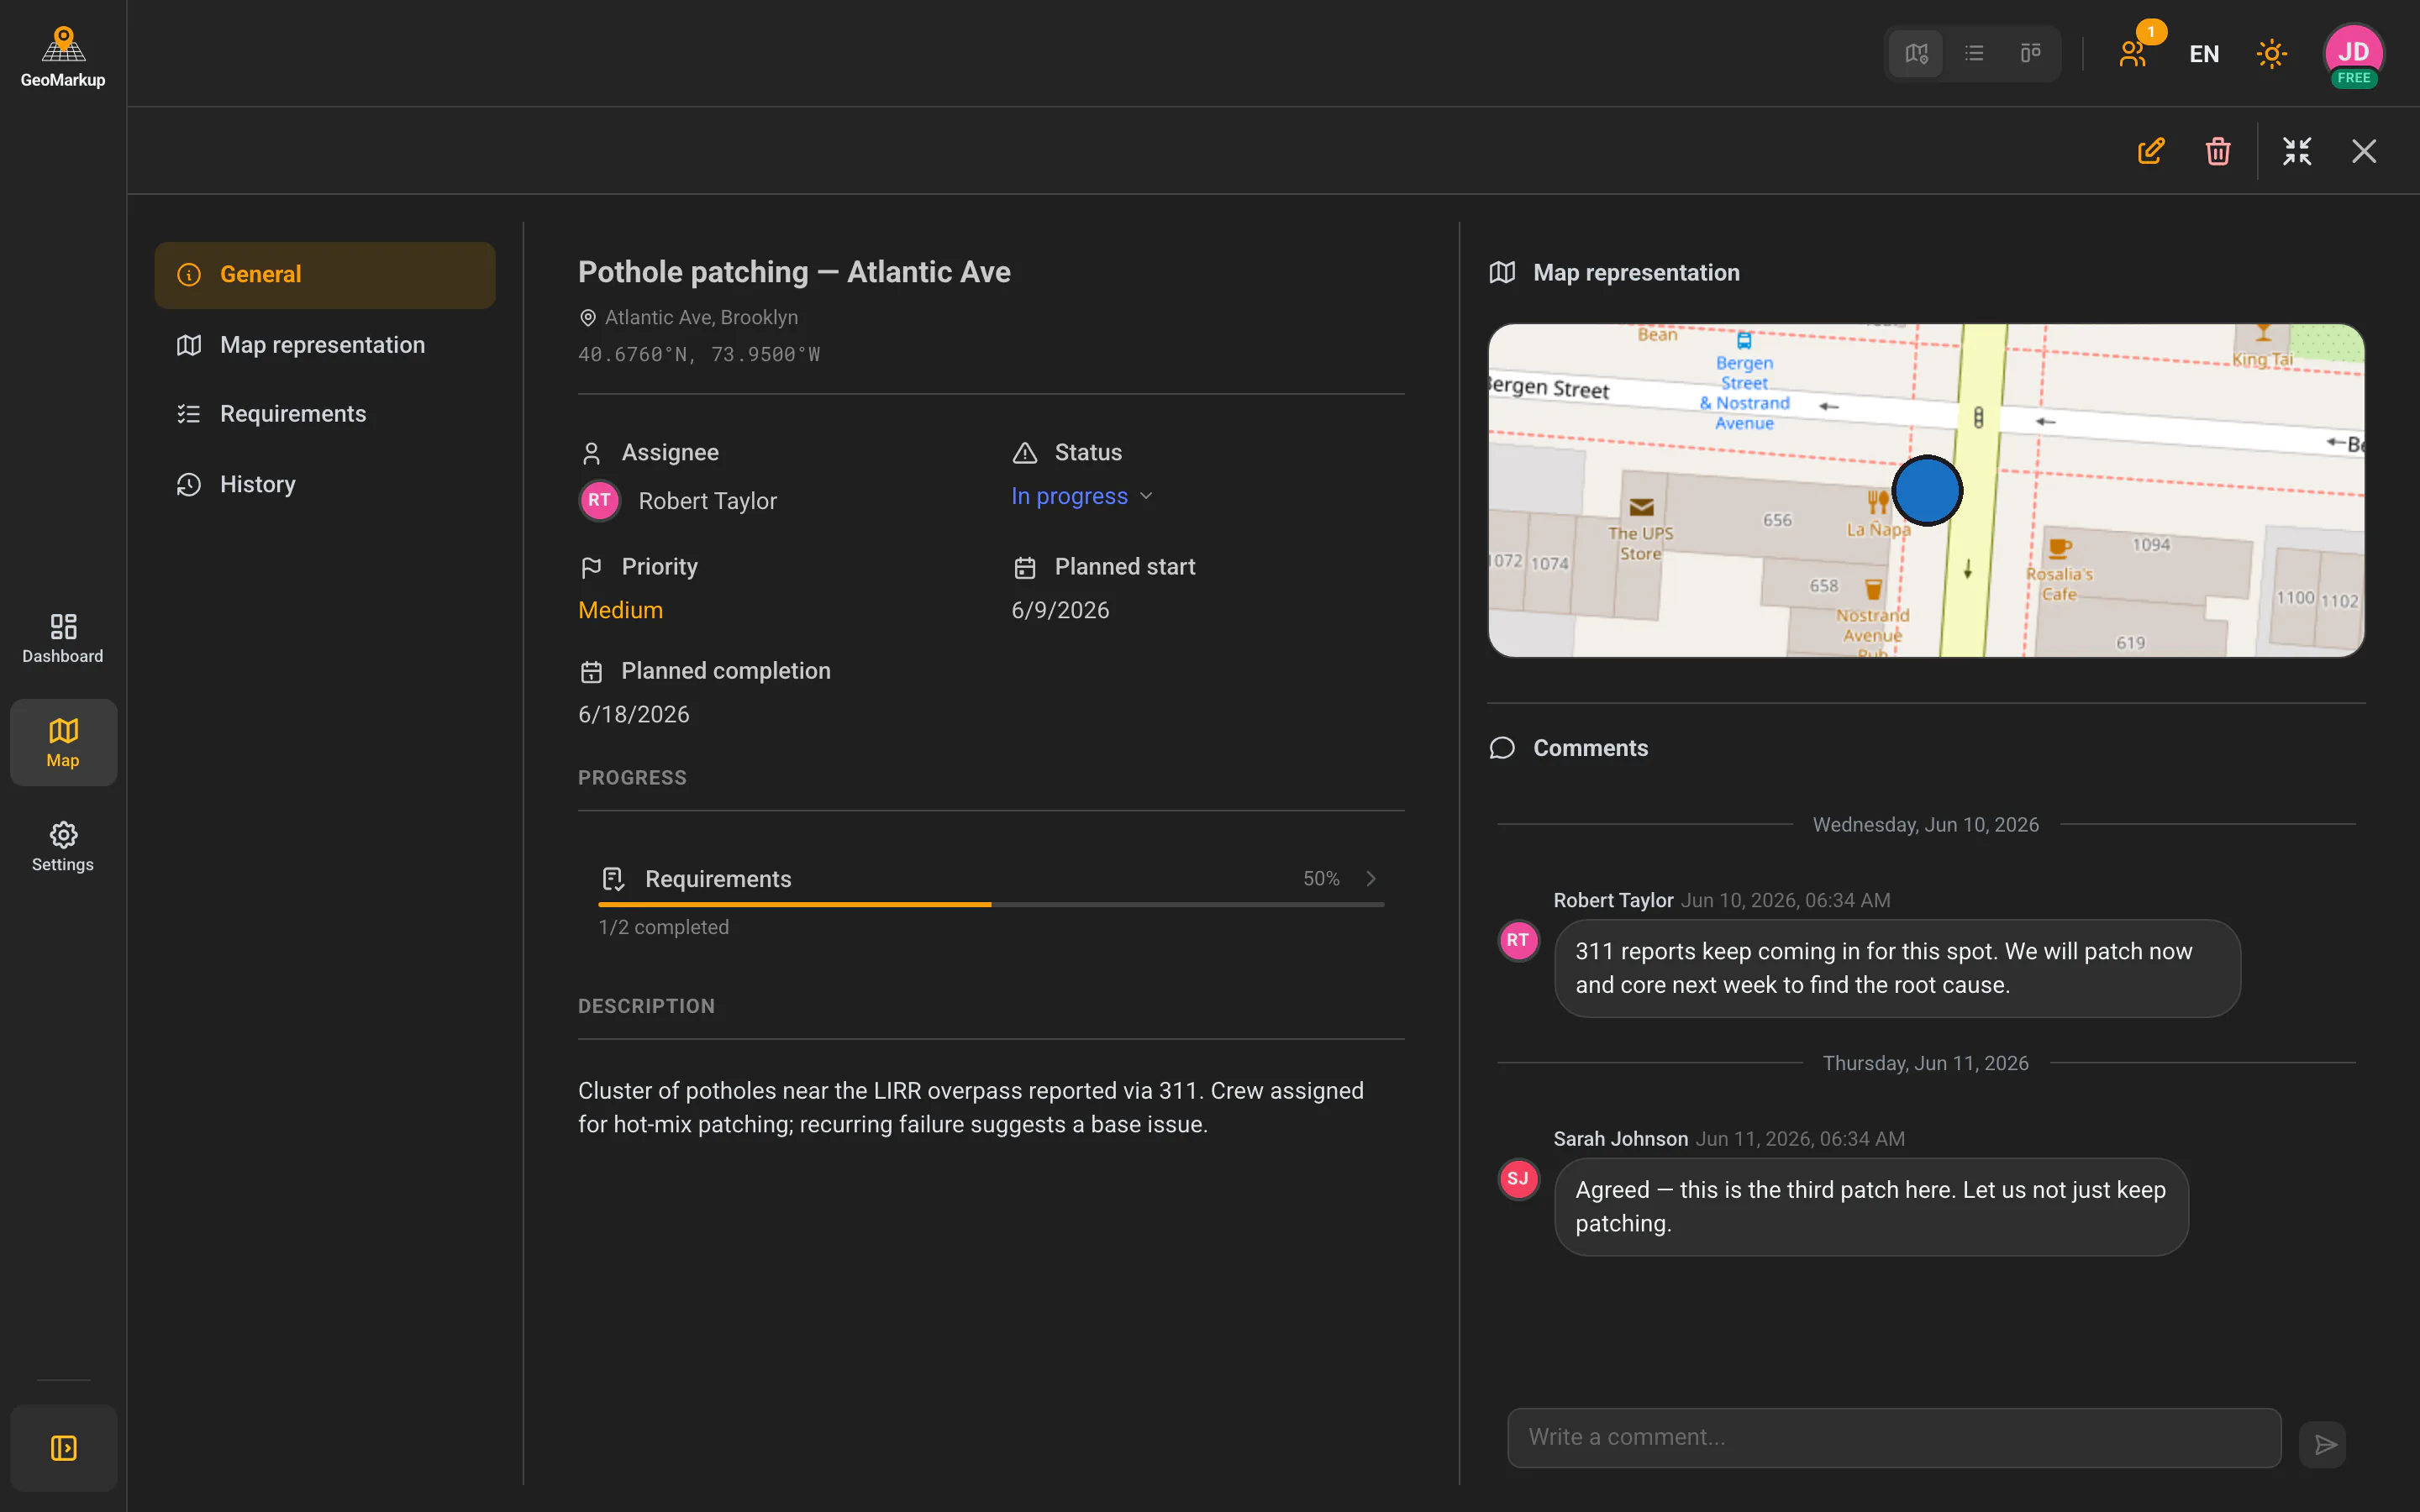
Opening and editing a task
Click any task (in the list, Kanban or map) to open the details panel. At the top of the panel you have Edit (pencil) and Delete (trash) buttons.
The details panel is divided into tabs (empty tabs are hidden):
| Tab | What it contains |
|---|---|
| General | Assignee, status, priority, dates, progress and description. |
| Map representation | A list of the task’s geometries, which you can edit, zoom to and delete. |
| Requirements | A checklist with a progress bar — tick off completed items. |
| Comments | Team discussion — write, edit and delete your own comments. |
| Attachments | Files — preview, download, delete. |
| Related tasks | Related tasks with their progress. |
| History | A full change log (who, what, when). |
| Notes | Linked notes. |
Quick status change
In the “General” tab, click the current status — a menu of available options expands (e.g. “In Progress”, “Delayed”, “Completed”). Pick a new status to change it.
Possible transitions:
- Pending → In Progress / Delayed
- In Progress → Completed / Delayed
- Delayed → In Progress / Completed
- Completed → In Progress (reopen)
Ticking off requirements
In the “Requirements” tab, each item has a checkbox. Tick it when that step is done. The progress bar shows how many requirements are completed (e.g. “3 of 5 completed (60%)”).
Comments
In the “Comments” tab, type your text in the “Write a comment…” field and send it. You can later edit your own comments (they’ll be marked “(edited)”) or delete them.
Attachments
In the “Attachments” tab, each file can be downloaded or deleted. Images, PDFs, documents and spreadsheets can be previewed directly in the app without downloading.
Deleting a task
- Open the task and click the trash icon at the top of the details panel.
- A prompt appears: “Are you sure you want to delete the task…?” with a warning that the operation is irreversible.
- Click “Delete” (or “Cancel”).
After deletion you’ll see “Task deleted successfully”.
Deleting a task cannot be undone.